
Getting a U.S. passport might be a necessary step for several of your upcoming trips (or dream trips!) but it can also be a stressful process.

Will You Be Traveling Soon?
In the past, the U.S. has done certain things to make the passport application process easier (like holding special passport fairs), but what can you do to make getting a passport a little less painful? We’ve got some tips!
1 — Use the Passport Wizard
First, consider using the Passport Wizard. This is a feature on the U.S. Department of State website that takes you through a series of questions that’ll help you know what you need to acquire to apply for your passport.

©U.S. State Department
It’ll direct you to the right passport application form, assist you in the estimation of your costs, and show you a brief overview of what documents you’ll need to present.
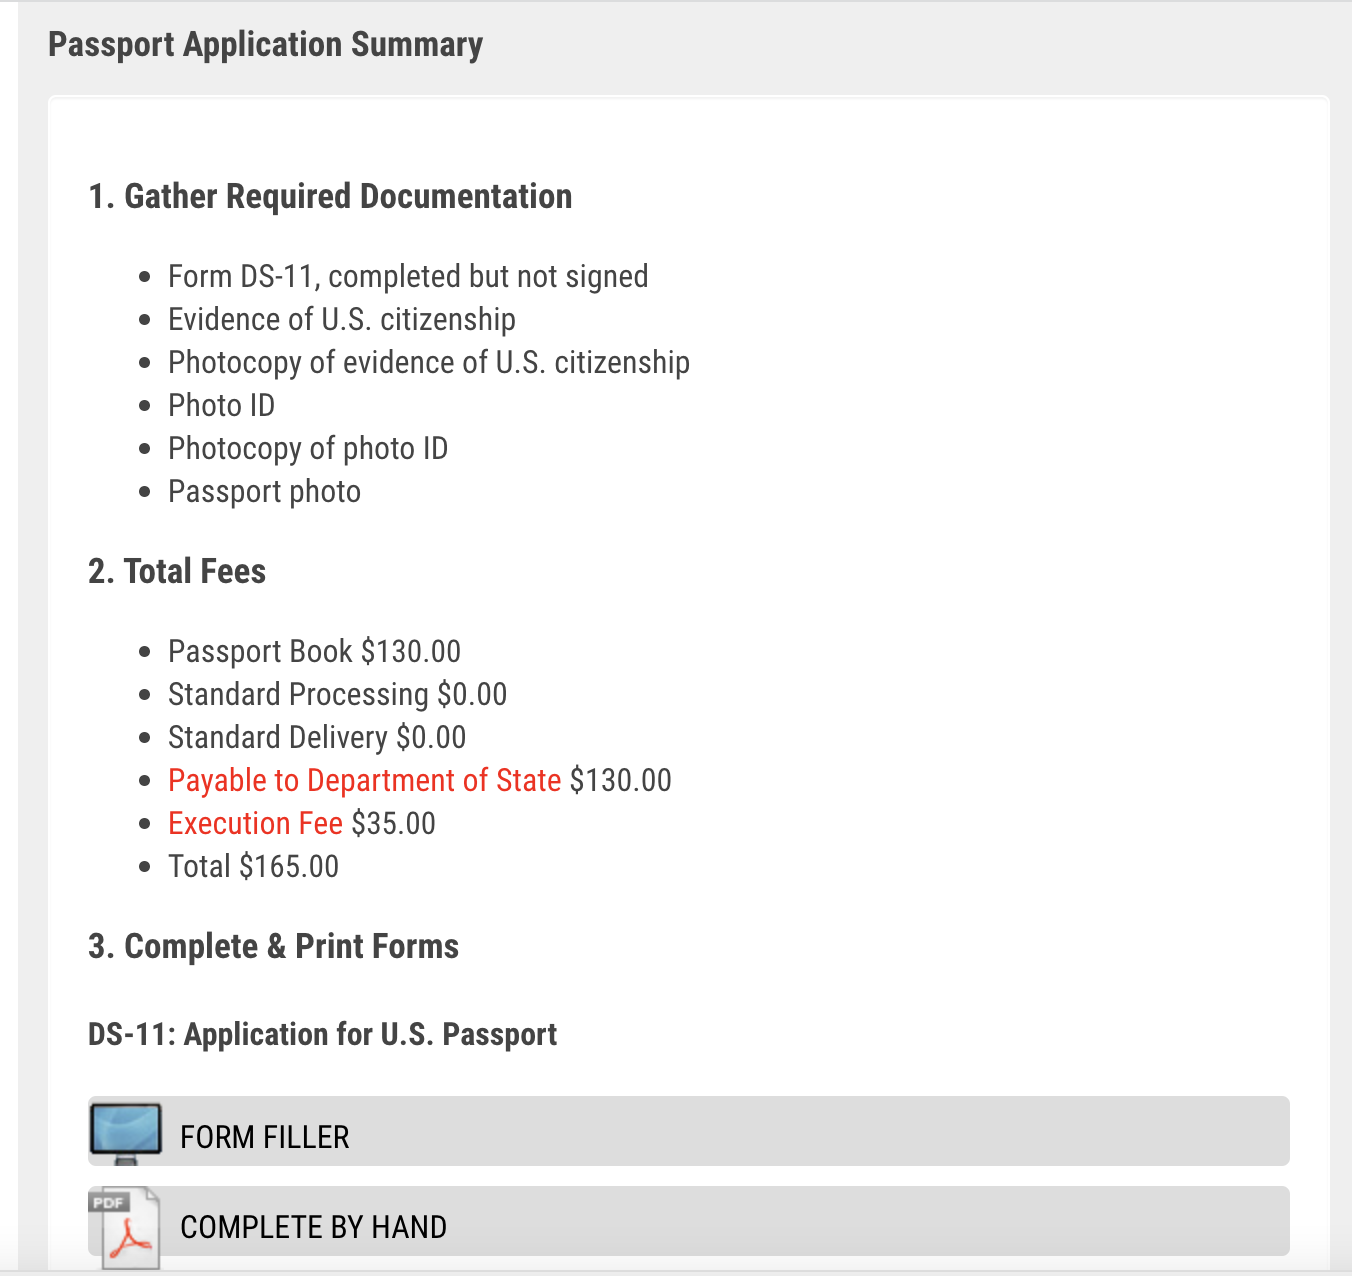
©U.S. State Department
While it might not give you every single little detail you need, it’s a great place to start your application journey!
2 — Make a List and Check It Twice
One of the best things you can do when applying for a passport is to stay organized, and making a list of everything you need is a great way to do that. By creating a complete list of all the things you need — from your application to your photo, copies of documents, and even a method to pay the fees — you can ensure that you get everything prepared BEFORE you go to your appointment.

Be Prepared!
The State Department website has a listing of some things you’ll need to do to get your passport, like filling out your form, calculating the cost, submitting a photo, and more. Be sure to go through each of those and create your list of things to bring so you can be prepared.
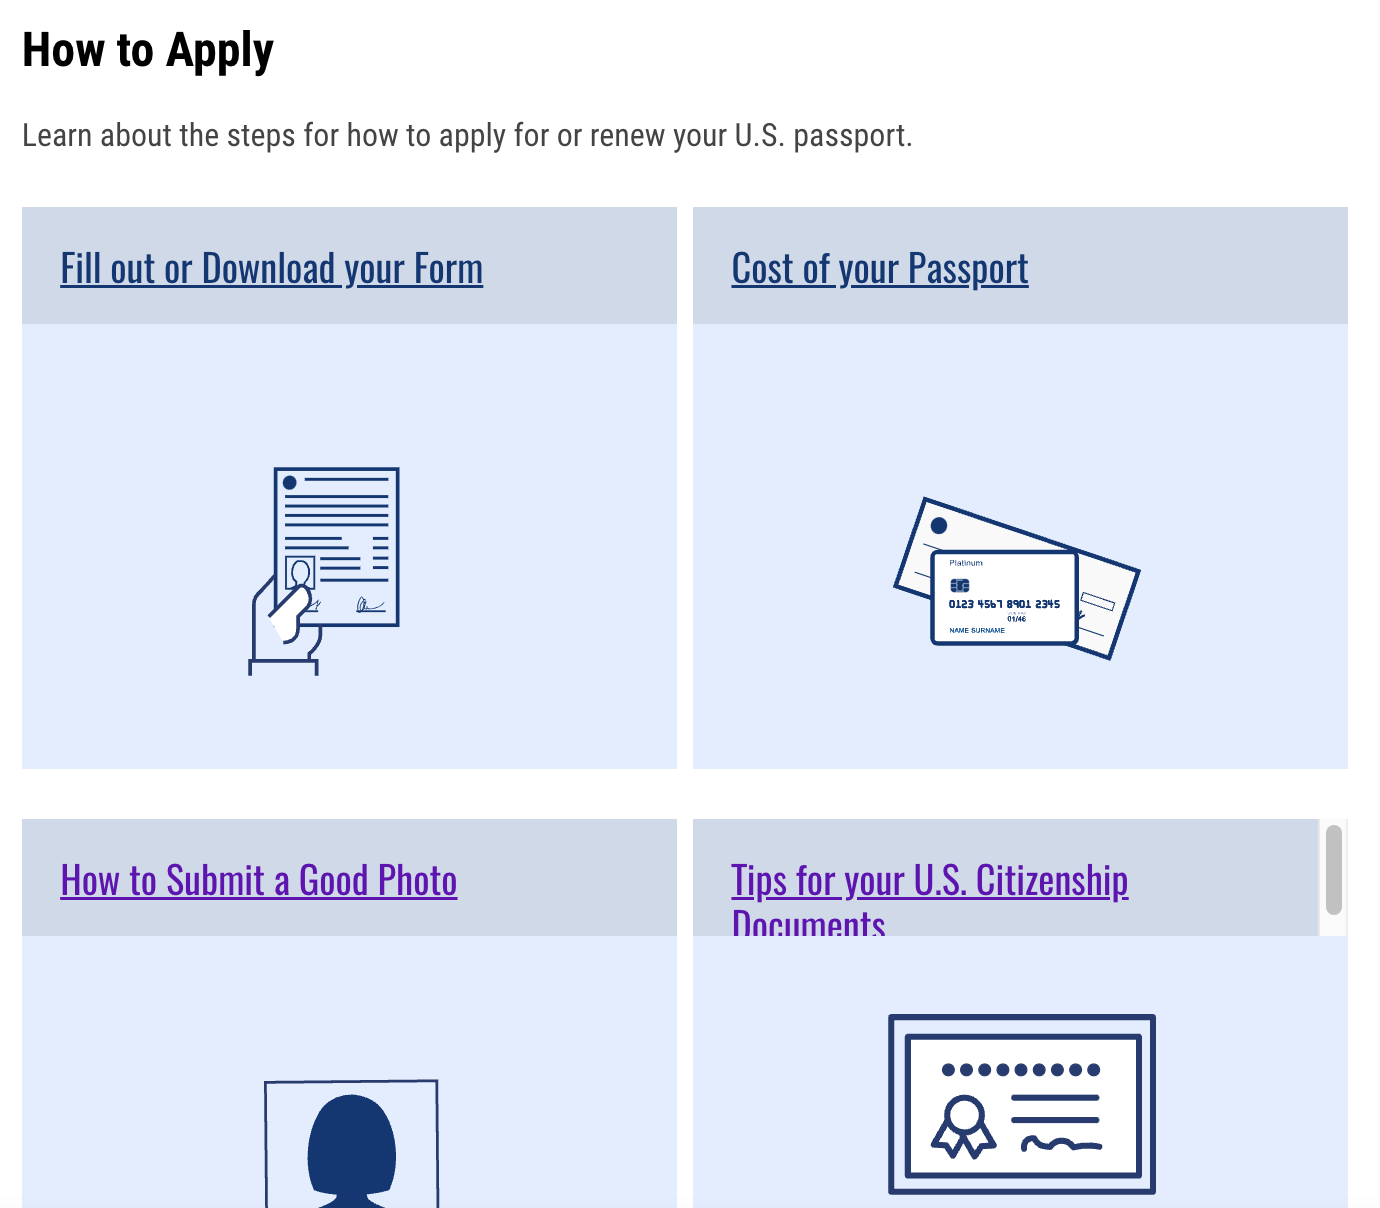
©U.S. State Department
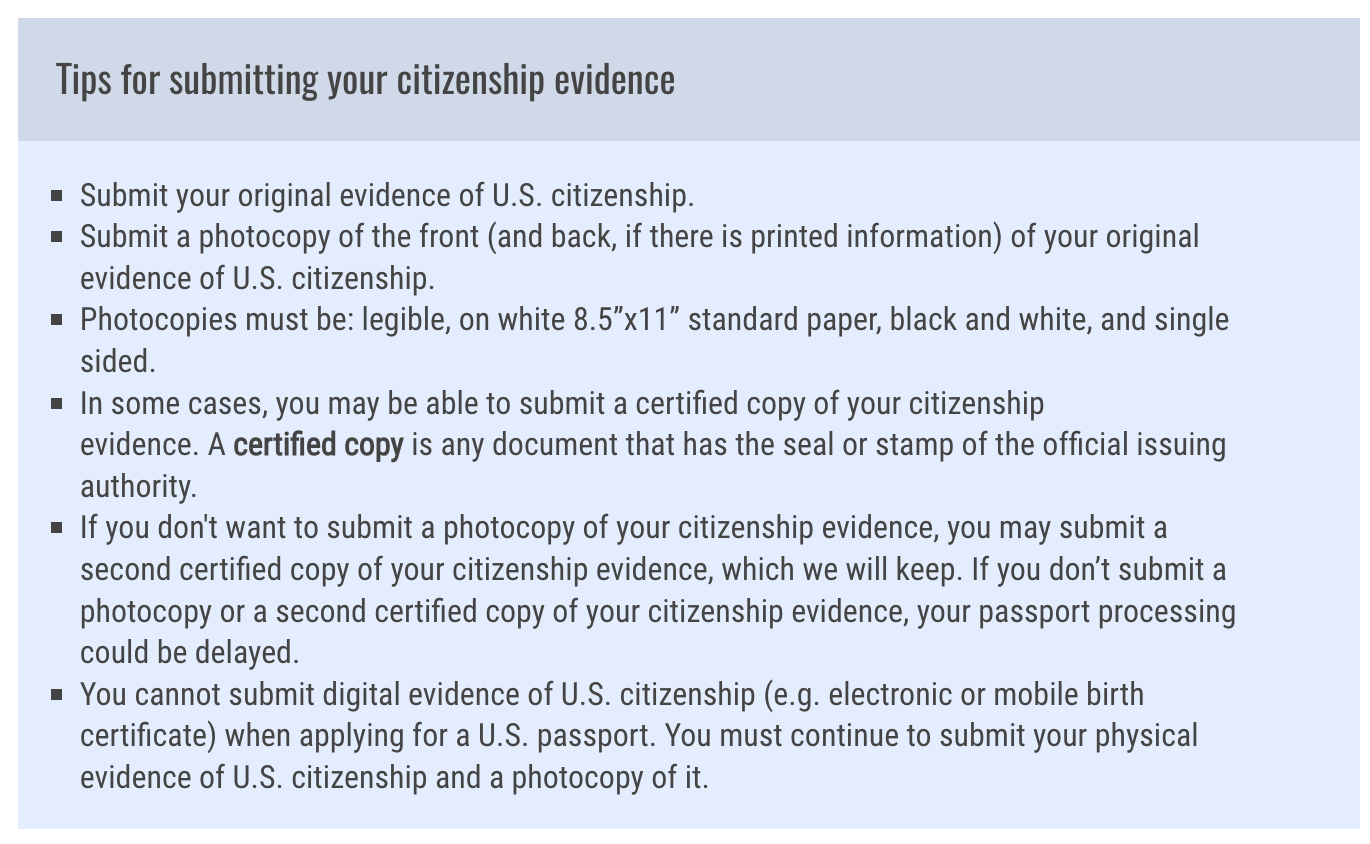
One thing you especially want to be careful of is the U.S. Citizenship Documentation. If you’re applying for a U.S. Passport using a Form DS-11 you will need to submit “primary evidence of U.S. citizenship” (or you’ll have to submit secondary evidence if you can’t provide primary evidence).
©U.S. State Department
Knowing what qualifies within each of these categories and what exactly you need to submit (the original AND a photocopy, for example) is of critical importance so you acquire the right things ahead of your submission.
3 — Get an “Official” Passport Photo
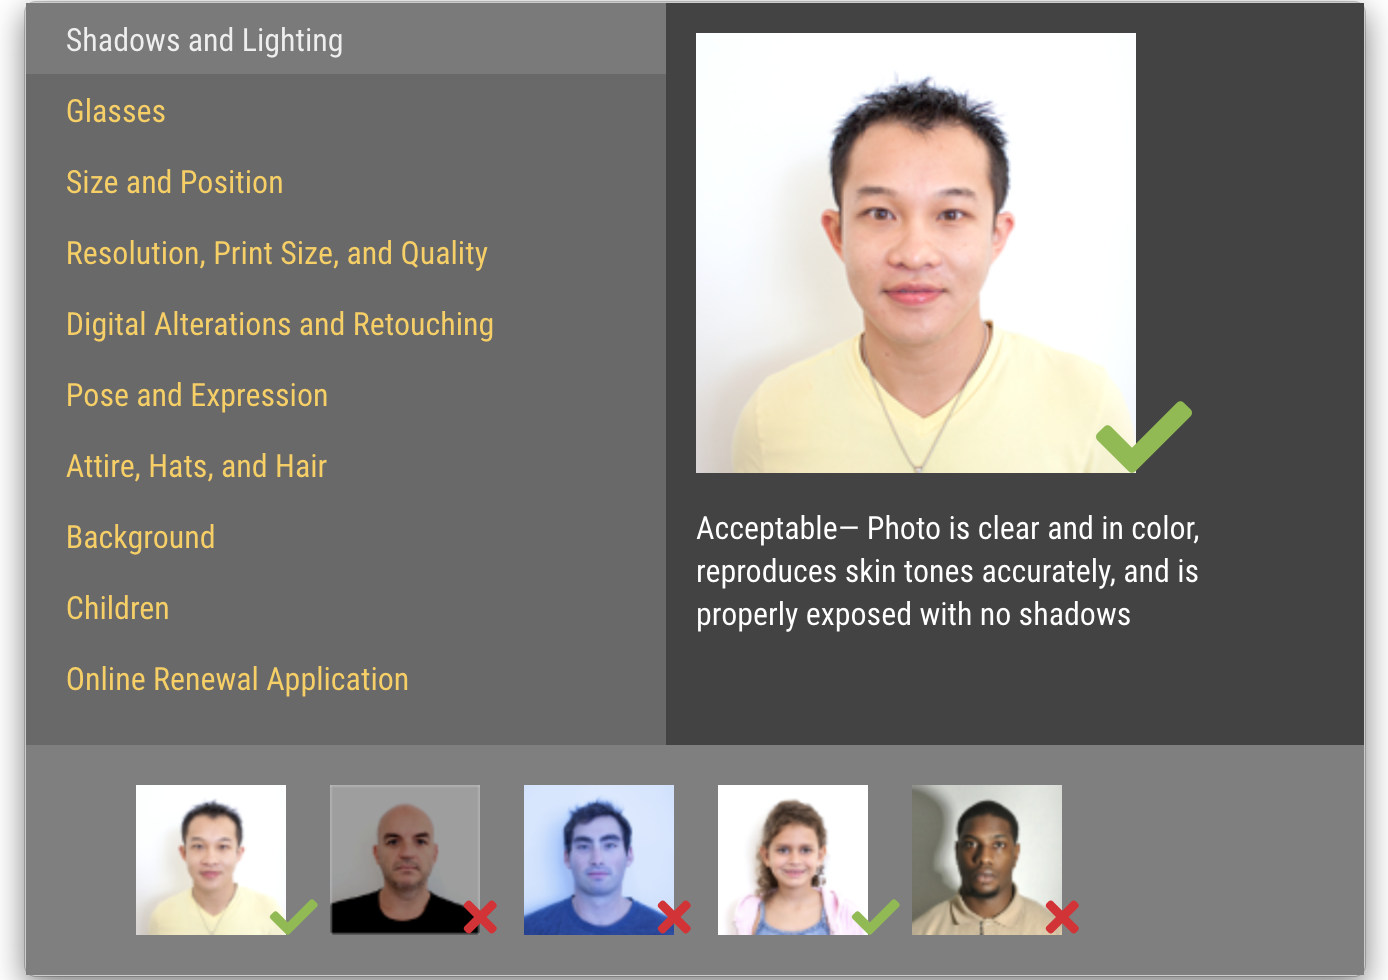
There are some very specific requirements when it comes to the photo you have to submit for your passport. For example, it has to be a color photo taken in the last 6 months, it must have a clear image of your face, no selfies are allowed, you have to take off your eyeglasses, etc.

©U.S. State Department
Taking a photo at home that meets all of these requirements might not be easy. If you take the photo at home and aren’t quite sure if it meets all the rules, that can add a layer of stress to your application process. It would not be fun to submit your paperwork only to be told that everything is right EXCEPT for your photo.
To avoid that potential issue, you can stop by a number of places to get a passport photo taken for you for a fee. Stores like CVS, Walgreens, the UPS store, and others typically offer this service (just check to see if it’s available in your area).
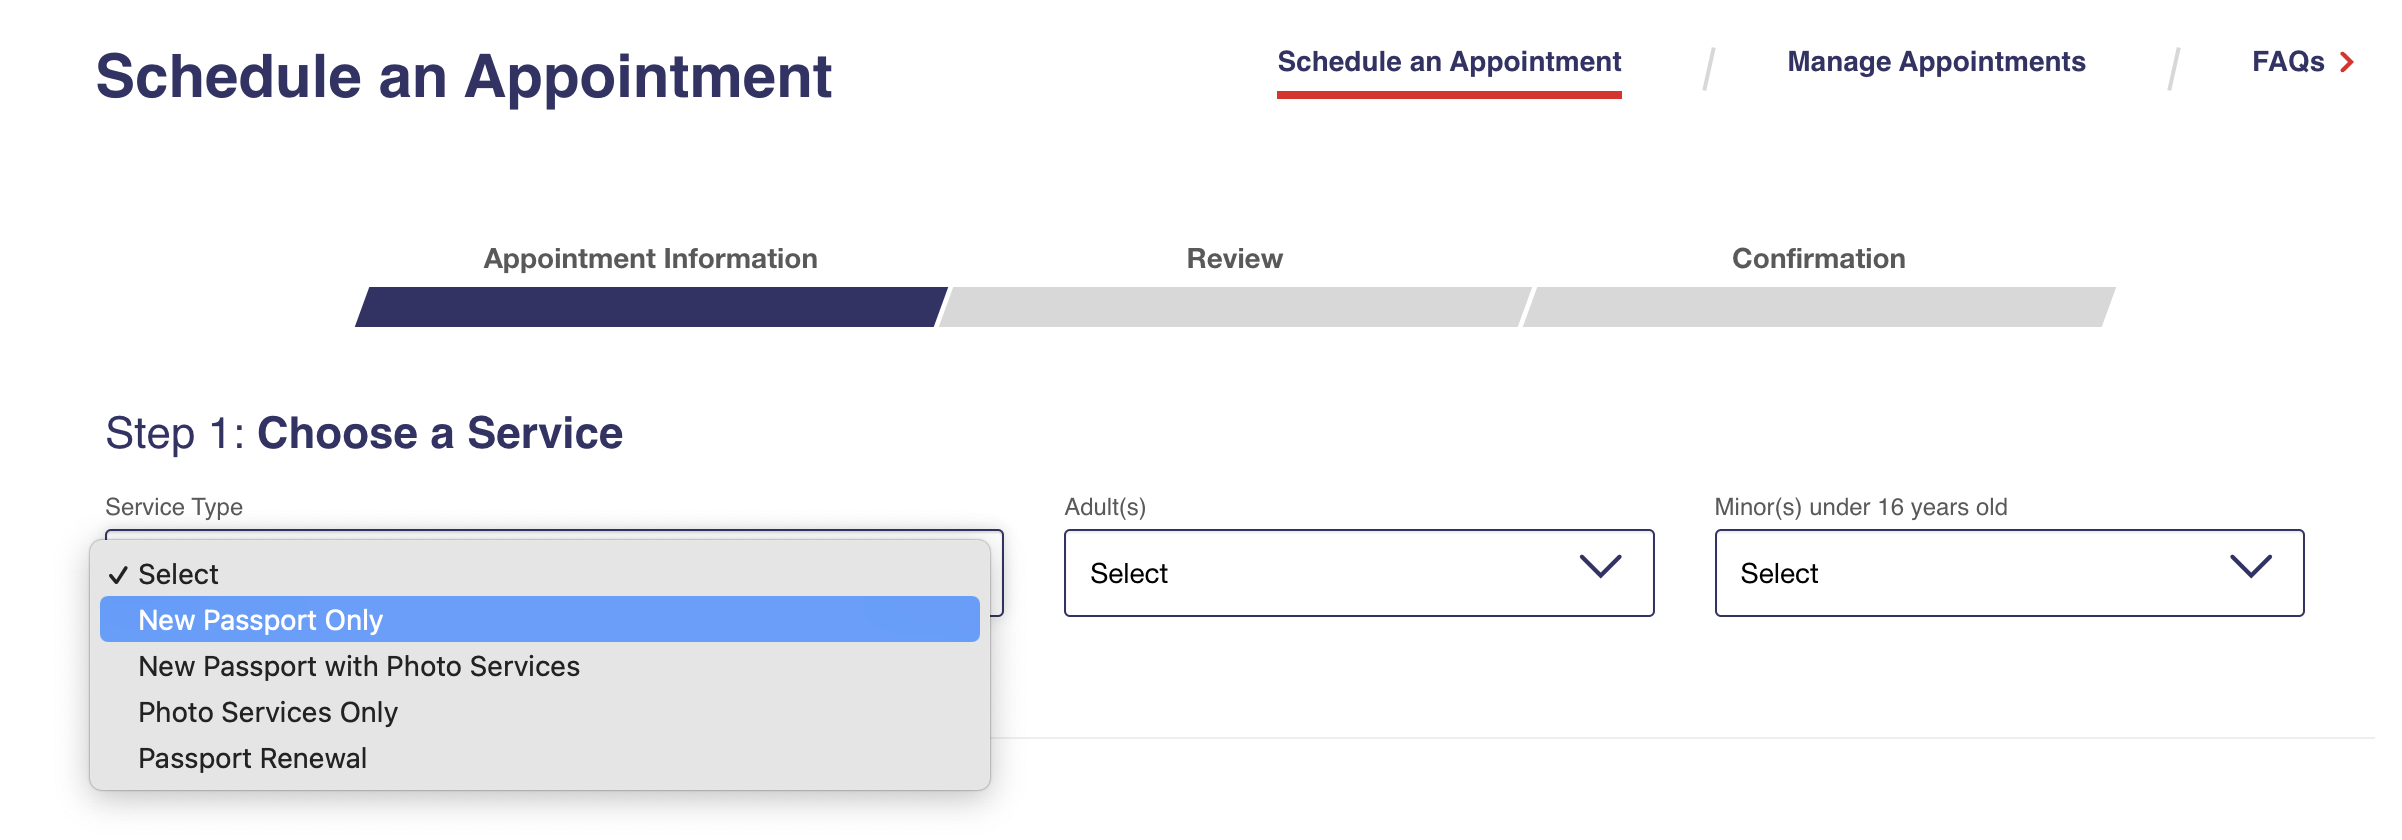
©U.S. State Department
You may also be able to make a passport application appointment that includes photo services so be on the lookout for that!
4 — See if a Special Passport Acceptance Fair is Available
During certain periods of time, passport acceptance fairs might be offered in the U.S. to make your application process easier! These fairs are held at facilities like post offices, libraries, and local government offices.

This Post Office in Toontown Can’t Help You Though!
What’s nice about these fairs is that instead of having to book an appointment at your “traditional” acceptance facility (which might only have appointments on very limited days further into the future), you might be able to score an appointment or walk-up availability sooner.
There are dates scheduled for these fairs in August, September, and October of 2023 (so far), and new events are being added weekly. Some spots may require appointments while others do not, so just keep that in mind. Click here to see more about the passport acceptance fairs.
5 — Make Your Appointment Early
If you don’t use a special fair and instead will just be submitting the application in person regularly, you’ll generally need an appointment and you’ll want to book that appointment well in advance.
Booking the reservation early will help ensure that you have more than enough time to find a place near you that has a time and date that works for your schedule. There may only be a limited number of appointment dates available and you may need to take a day off of work to get it done, so knowing that in advance will take some of the stress away from the process.
©U.S.P.S.
You may also want to book an appointment for as early in the day as you can. Generally, the sooner your appointment is, the less potential there is for the application location to be running late from other appointments that were ahead of you.
You can also check to see if there are any walk-in hours for passport services. Select spots may have this and that might help you submit your documentation on a date that’s convenient for you!
6 — Opt for an Expedited Service
There are different levels of processing services you can select when applying for a passport — emergency, urgent travel, expedited, or routine. But you do need to meet some requirements to be eligible for certain ones.
For example, Expedited Service is available if you are traveling less than 13 weeks from the date of your application’s submission.
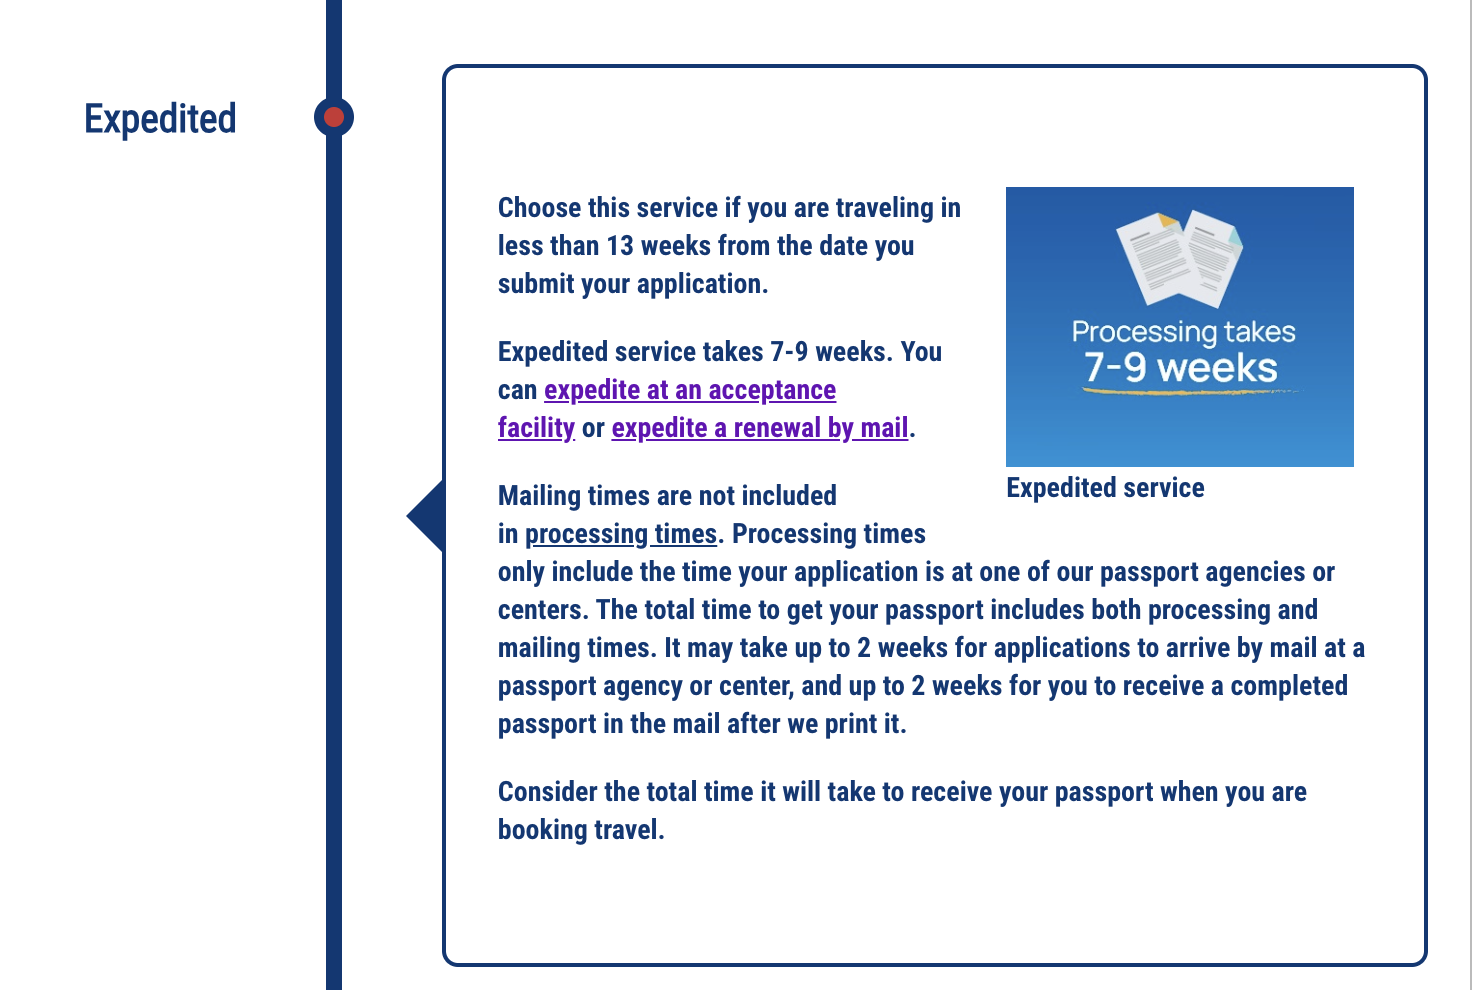
©U.S. State Department
If you need to get your passport quickly, look at these options carefully to see what you might qualify for. If you don’t qualify, just understand that typically processing time for a routine passport application is 10-13 weeks, and mailing times aren’t included in that processing time.
The State Department warns “It may take up to 2 weeks for applications to arrive by mail at a passport agency or center, and up to 2 weeks for you to receive a completed passport in the mail after we print it. Consider the total time it will take to receive your passport when you are booking travel.”
Southwest plane
So when you’re deciding on a service method, be sure to consider upcoming plans and these processing times.
7 — Plan in Advance
Finally, get started on your passport application (or even passport renewal) WAY in advance of future trips if at all possible. Before you book that next vacation, see what the passport requirements will be and how much time you’ll need to get everything in order.
Don’t just assume that a passport application appointment will be available next week — it may be several weeks before one is open near you, and that could seriously impact your plans.
Alaska Airlines
If you already have a passport, be sure to look carefully at when it’ll expire. Try not to wait to renew or make a change at the last minute. Set reminders in your calendars or phones in advance to warn you that it’s time for renewal!
Again, routine processing can take around 10-13 weeks, but you can get started on your passport renewal well before that. Some suggest starting the renewal process around 6 months (or even 9 months) BEFORE your passport expires so that you have plenty of time.

LaGuardia Airport
Keep in mind that some countries may require that your passport be valid for at least 6 months BEYOND the dates of your trip. So you’ll need to look closely at that before booking a trip with a passport that’ll expire soon.
And those are some tips to help your next passport application (or potentially renewal) be a little less stressful. For more tips about vacationing, click here to see the mind-blowing Amazon bag that might change the way you travel. And stay tuned for more news.
These Are the Most Annoying Airplane Passengers – Are You One of Them?
Travel Updates, Tips, and Tricks

-
Complete Guide to Booking the CHEAPEST Flight to Disney World
-
Our Best Tips For Flying Through the Orlando International Airport
-
Step-by-Step Guide: How to Get to Disney World From the Orlando Airport
Join the DFB Newsletter to Get All the Latest Disney News Delivered Right to Your Inbox! Click Here to Subscribe
What are your tips for getting a passport? Tell us in the comments.
The post 7 Tips To Make Getting a Passport Less Painful first appeared on the disney food blog.