
Hello, friends! Happy Saturday! We’ve made it to the end of another week, and if you ask me, we deserve chocolate. But not just any chocolate. We deserve ooey gooey melty chocolate surrounded by rich cake. Yes friends, for this weekend’s Saturday Snacks, we deserve California Grill‘s Lava Cake.
If you’ve never been to California Grill atop Disney’s Contemporary Resort, I cannot stress enough how very much I hope that you get to. Save up your pennies because it isn’t cheap, but it’s worth those pennies. The view is stunning, the restaurant’s environment is gorgeous, and the food is divine.
While the lava cake is no longer on the menu at California Grill, it lives on in the recesses of the internet. D23 shared the recipe some time ago, and now you and I can bring that amazing chocolately goodness right into our very own kitchens. And even better is the fact that it can be made with ingredients that you and I might have on-hand.
Several weeks back, I made Disney Cruise Line‘s Palo Chocolate Soufflé. The soufflés were light and airy, and oh so delicious. When baking up those soufflés, I needed my six 6-ounce ramekins. I’ll be grabbing those back out of the cabinet for today’s lava cakes. Those little dishes come in handy!

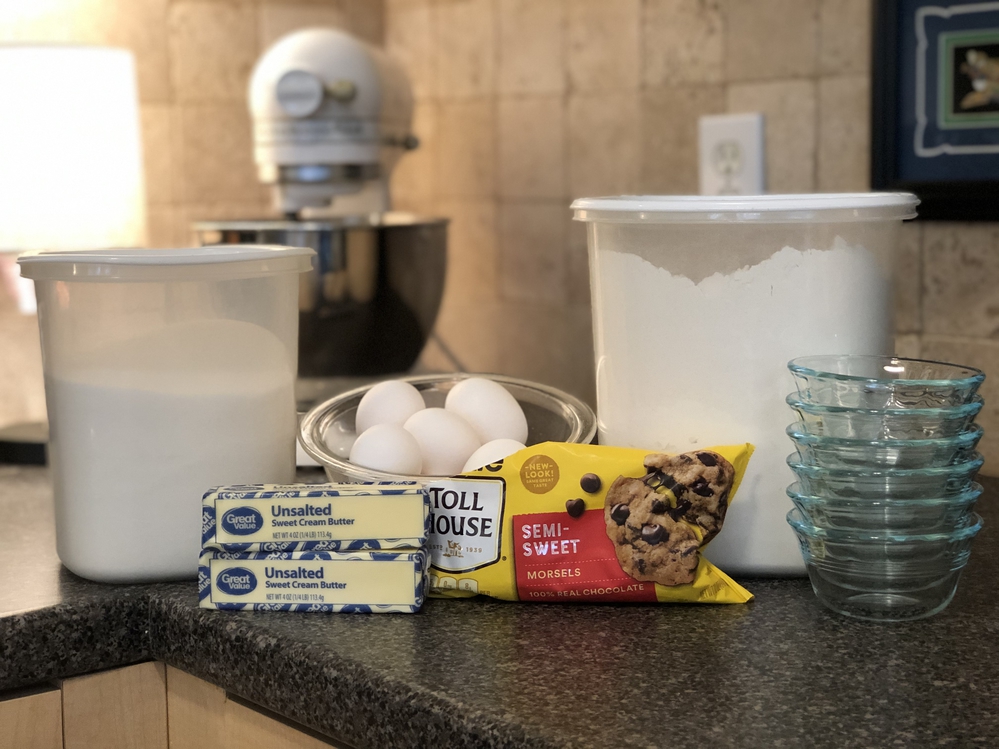
Warning: this recipe calls for 9 eggs. NINE. It surprised me, but, thankfully, we had enough in the fridge and ready to go. Just in case they’re not a staple for you, grab a dozen the next time you’re scheduling a grocery pickup or making a quick stop at the store.

First things first: preheat your oven to 375 and butter the bottom and sides of the ramekins. When the cakes come out of the oven, you want them to slip out of the dish and onto a plate, so make sure that butter coats the inside completely.

Sprinkle a little sugar in each ramekin and turn the dish so that the butter grabs ahold of the sugar and coats the inside of each ramekin. Pour out the extra sugar. I recommend doing the sugar swirling over the sink. It’ll save you a bit of clean up time.

Next, create a makeshift double boiler, just like we’ve done in weeks past. Fill a pot less than halfway or so with water, and place a glass bowl on the top of it. Bring that water to a gentle boil and place the cup of semisweet chocolate chips (or 8 1-ounce semisweet chocolate squares) and two sticks of butter in the bowl.

Once the butter and chocolate begin melting, stir. Once the mixture becomes smooth and glossy, take it off of the pot of water, and place it aside to cool for 10 minutes or so.

This is the step where you need ALL THE EGGS. Gently start cracking those eggs until you have 4 whole eggs and 5 yolks. And maybe make an egg white frittata with the leftover whites.

Transfer the eggs into a mixing bowl and beat them either with a stand or hand mixer. After beating the eggs, drop in 3/4 cup of granulated sugar and beat for 2 minutes or so. The mixture will still be very liquidy (we’ve just made that an official word), but it’ll be lighter in color and just a bit thicker.

After the chocolate has cooled for 10 minutes, fold it into the egg mixture. I had to be a bit more assertive than just folding to get everything incorporated, but, in the end, it all came together. But try not to over mix the batter.

At this point, you can sprinkle in 1/3 cup of sifted flour and, again, while the recipe calls for folding in the flour, I had to put a little more muscle into it in order to completely blend everything.

Once’s everything’s blended, it’s time to carefully scoop the batter into the prepared ramekins. It’ll be drippy, so watch out.

Divide the batter evenly among the dishes without going too close to the top. You want a little room for the cakes to do their thing. The recipe calls for the ramekins to be filled to 3/4 full.

At this point, pat your little ramekins on their heads and send them on their way. The recipe calls for the lava cakes to bake for 35 to 40 minutes or until the sides are done and the middles are still soft, however…
Friends, this is where we get to the “cautionary tale” portion of today’s Saturday Snacks story. Let’s huddle up. Lean in. We need to get on the same page about something before we go any further in our lava cake adventure.
While the recipe calls for the cakes to take 35 or 40 minutes, understand that they will take nowhere near that. Nowhere. The second part of the sentence regarding time in the recipe is critical: “…or until sides of cake are set and middle is still soft. Do not over-bake.” Ahem. So, on my first go-round with this recipe, I set a timer for 35 minutes and promptly cleaned up the kitchen and sat down and started writing this article while I watched the last song of Hamilton on Disney+, awaiting what I was sure was going to be ooey gooey delicousness coming out of the oven. Friends, this did not happen.

Don’t let the picture above fool you. While they look lovely, they are over-baked. Done. Throw-in-the-towel done. While they were pretty, what was on the inside was akin to the texture of a soufflé, which is fine if you’re going for a soufflé, but not fine if you’re expecting oozing chocolate lava upon cutting into your cake. I know that every oven runs differently, but this was ridiculous.
I thought I was fine with telling you this story and eating my soufflé-like lava cake and letting that be that….until I sat down and starting writing this article.

At that time, I went back into the kitchen and re-made the recipe (in half this time because my hubby and I didn’t need ANOTHER SIX lava cakes lying around the kitchen). I placed my “round two” cakes into the oven and set the timer for 20 minutes. Yes, a full fifteen minutes shy of the target of 35 minutes as stated in the recipe.

What emerged from the oven after just 20 minutes was what I expected in the first place, plus some. The sides were set, and the middle was soft set.

The outside of each lava cake was sugar-encrusted, the outer cakey portion was light and baked through, and, upon digging into the cake, the most glorious lava flowed out. It was perfect. Twenty minutes turned out to be all that the cakes need to do their thing.
The moral of the story is that, if at first you don’t succeed, try, try again. Mess up the kitchen again. Give yourself a second chance. Especially when the promise of a rich chocolate cake hangs in the balance. It’s worth it.

If your lava cakes need a little coaxing to come out of their ramekins, slide a knife around the outside before placing a plate on top of the ramekin and turning it over to allow the cake to release from the dish. A little scoop of vanilla ice cream is the perfect accompaniment to this treat.

Have you given lava cakes a whirl before? What are you baking up these days? Please let me know in the comments section below. Have a great weekend!

Ready to give the recipe a try? You’ve got this!
CALIFORNIA GRILL’S CHOCOLATE LAVA CAKE
Ingredients
8 1-ounce semisweet chocolate squares, chopped or 1 cup semisweet chocolate chips
2 sticks of butter
5 egg yolks
4 whole eggs
3/4 cup sugar
1/3 cup all-purpose flour
Preparation
- Preheat oven to 375°F.
- Lightly butter sides of 6 individual (3/4 cup) ramekins. Lightly coat with sugar, shake out excess.
- Melt chocolate and butter in top of double boiler set over simmering water. Stir until smooth.
- Remove from over water and cool 10 minutes.
- Beat egg yolks and whole eggs together in a large bowl; add sugar and beat until thick and light, about 2 minutes.
- Fold in chocolate mixture. Sift flour, then fold into batter, mixing until smooth.
- Divide batter among prepared cups, filling 3/4 full. Place on a baking sheet and bake about 35 to 40 minutes or until sides of cake are set and middle is still soft. Do not over-bake. *Deni’s note: bake for only 20 minutes. Trust me.*
- Using a small knife, cut around sides of cakes to loosen. Invert onto plates and serve with your favorite ice cream. Serves 6.
Disney’s note:
You can also use muffin tins; recipe makes 12. Bake for 15 minutes or until set and middle is still soft.
Source: D23